Powershell script to list StorSimple network interface information including MAC addresses
In many cases we can obtain the IP address of a network interface via one command but get the MAC address from another command. StorSimple 8k series which runs a core version of server 2012 R2 (as of 20 June 2016) is no exception. In this case we can get the IP address information of the device network interfaces via the Get-HCSNetInterface cmdlet. However, to identify MAC addresses we need to use the Get-NetAdapter cmdlet. This Powershell script merges the information from both cmdlets presenting a PS Object collection, each of which has the following properties:
- InterfaceName
- IPv4Address
- IPv4Netmask
- IPv4Gateway
- MACAddress
- IsEnabled
- IsCloudEnabled
- IsiSCSIEnabled
Script output may look like:

For more information about connecting to StorSimple via PowerShell see this post.
Powershell script to migrate FSRM Quota settings
8 February 2021 update:
Sadly, Microsoft has retired the Technet Script Repository in December 2020, and redirected its traffic to this page. Microsoft failed to archive the numerous scripts that the community contributed to Github as they stated. This has done a significant disservice to the community.
As I get emails about people unable to get the scripts. I will republish them to the PowerShell Gallery. I’m hoping this is the last time I need to republish code on a Microsoft site.
To get this script visit this page, or invoke the following command from a Windows 10 computer running PowerShell 5:
Install-Script -Name Import-FSRMQuota
When migrating file servers, you may need to migrate FSRM based Quota settings.

There can be hundreds of these settings based on FSRM Quota templates. <Old link to Microsoft retired Technet Gallery> This Powershell script migrates FSRM Quota settings <Old link to Microsoft retired Technet Gallery> from remote server to local computer, including Quota Templates, Admin Options, and Quotas applied to folders.

Sample script output:

As usual, script output is displayed at the console and saved to a log file for future reference.
After running the script the FSRM Quota Templates and FSRM Quotas (applied to folders) can be viewed in the File Server Resource Manager (Server 2012)

Powershell script to backup all user databases on current SQL server
This script will backup all user databases on the current SQL server. The Input region accepts values for 2 variables:
$Destination ==>This is the folder where backup files will be stored
$Retension ==> Number of days to keep backup files. Backup files older than this will be deleted. If you don’t want any files deleted, make this number high like 99999
The script creates a folder for each database under the $Destination folder. Backup file name contains the database name and date/time of backup. For example, for database ‘INM’, backup file would be ‘H:\SQL-Backup\INM\INM-20160605_081237AM.bak’
Script returns an object collection. Each object has the following properties:
- ServerName
- DatabaseName
- RecoveryModel
- BackupDateTime(yyyyMMdd_hhmmsstt)
- BackupDuration(hh:mm:ss)
- BackupFileSize(MB)
- BackupFileSize
Sample script output:

Also see script to list SQL Recovery Model of all databases on current server, script to modify and list SQL Recovery Model of all databases, and this related post.
Presenting StorSimple iSCSI volumes to a failover cluster
In a typical implementation, StorSimple iSCSI volumes (LUNs) are presented to a file server, which in turn presents SMB shares to clients. Although the StorSimple iSCSI SAN features redundant hardware, and is implemented using redundant networking paths on both the Internet facing side and the iSCSI side, the file server in this example constitutes a single point of failure. One solution here is to present the iSCSI volume to all nodes in a failover cluster. This post will go over the steps to present a StorSimple iSCSI volumes to a failover cluster as opposed to a single file server.
Create volume container, volume, unmask to all cluster nodes
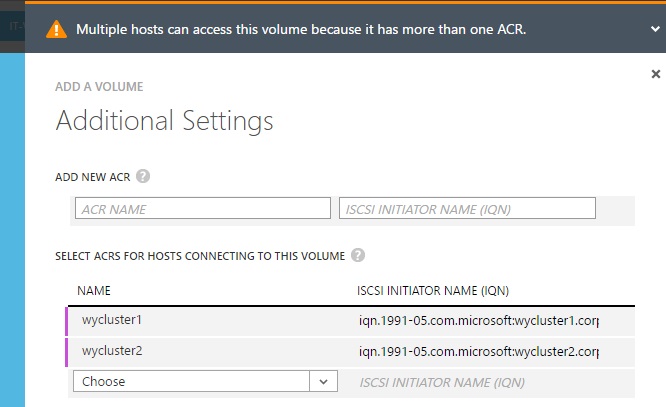
As usual, keep one volume per volume container to be able to restore one volume at a time. Give the volume a name, size, type: tiered. Finally unmask it to all nodes in the failover cluster:
Format the volume:
In Failover Cluster Manager identify the owner node of the ‘File Server for general use‘ role:

In Disk Management of the owner node identified above, you should see the new LUN:

Right click on Disk20 in the example above, click Online. Right click again and click Initialize Disk. Choose GPT partition. It’s recommended to use GPT partition instead of MBR partition for several reasons such as maximum volume size limitation.
Right click on the available space to the right of Disk20 and create Simple Volume. It’s recommended to use Basic Disks and Simple Volumes with StorSimple volumes.
Format with NTFS, 64 KB allocation unit size, use the same volume label as the volume name used in StorSimple Azure Management Interface, and Quick format. Microsoft recommends NTFS as the file system to use with StorSimple volumes. 64KB allocation units provide better optimization as the device internal deduplication and compression algorithms use 64KB blocks for tiered volumes. Using the same volume label is important since currently (1 June 2016) StorSimple does not provide a LUN ID that can be used to correlate a LUN created on StorSimple to one appearing on a host. Quick formatting is important since these are thin provisioned volumes.
For existing volumes, Windows GUI does not provide a way of identifying the volume allocation unit size. However, we can look it up via Powershell as in:
@('c:','d:','y:') | % {
 $Query = "SELECT BlockSize FROM Win32_Volume WHERE DriveLetter='$_'"
 $BlockSize = (Get-WmiObject -Query $Query).BlockSize/1KB
 Write-Host "Allocation unit size on Drive $_ is $BlockSize KB" -Fore Green
}
Replace the drive letters in line 1 with the ones you wish to lookup.
Summary of volume creation steps/best practices:
- GPT partition
- Basic Disk (not dynamic)
- Simple volume (not striped, mirrored, …)
- NTFS file system
- 64 KB allocation unit (not the default 4 KB)
- Same volume label as the one in StorSimple
- Quick Format
Add the disk to the cluster:
Back in Failover Cluster Manager, under Storage, right click on Disks, and click Add Disk

Pick Disk20 in this example

Right click on the new cluster disk, and select Properties

Change the default name ‘Cluster Disk 3’ to the same volume label and name used in StorSimple

Assign Cluster Disk to File Server Role
In Failover Cluster Manager, under Storage/Disks, right click on TestSales-Vol in this example, and select Assign to Another Role under More Actions

Select the File Server for General Use role – we happen to have one role in this cluster:

Create clustered file shares
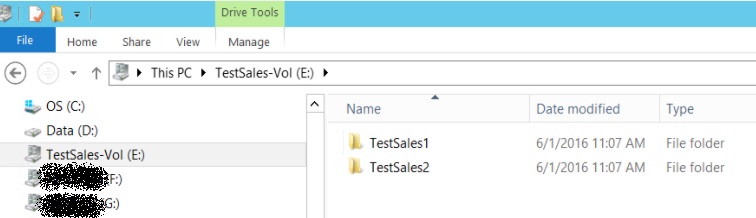
As an example, I created 2 folders in the TestSales-Vol volume:
In Failover Cluster Manager, under Roles, right click on the File Server for General Use role, and select Add File Share

Select SMB Quick in the New Share Wizard

Click Type a custom path and type in or Browse to the folder on the new volume to be shared

Change the share name or accept the default (folder name). In this example, I added a dollar sign $ to make this a hidden share

It’s important to NOT Allow caching of share for StorSimple volumes. Access based enumeration is my personal recommendation

Finally adjust NTFS permissions as needed or accept the defaults:

Click Create to continue

Repeat the above steps for the TestSales2 folder/share in this example
