Nasuni Filer initial setup
Nasuni provides managed storage service that offers interesting functionality in the cloud integrated storage space. After installing the Nasuni Filer VM, and browsing to the IP address of the VM:
1. Expand the Nasuni Virtual Filer Cache size:
The default cache of the local filer is 64GB. This is implemented as a dynamic VHDX file. 
This disk will house all volumes provisioned on this Filer or brought down from other Filers in this or other sites to make remote shares available to users of this site.
To increase the size of this file – local cache size of this Filer:
- Stop the Nasuni Filer VM. For example, use the Powershell cmdlet Stop-VM, or right-click on the Filer VM in Hyper-V Manager and select shutdown.
- Expand the cache.vhdx file either via Powershell cmdlet from the VM settings in Hyper-V Manager
- Start the Nasuni Filer VM
The Nasuni Filer detects the new cache disk size and expands the cache size accordingly:

Expanding the cache size will be an IO intensive process:
 At the end of this process, which takes several minutes, the cache size reflects the new cache.vhdx file size
  It’s unlcear why the actual cache.vhdx file size takes 110.7 GB on disk for a 500GB cache, while the same file took 1.5GB on disk for 64GB cache. There seems to be no linear correlation..
2. Remove/adjust the default bandwidth restriction:
Since I’m managing the 3 filers in this demo using NMC (Nasuni Management Console), I have to do this step in NMC. In the NMC, click Filers on top, then Quality of Service on the left, check the box next to the desired filer, and click Edit

Click the button next to the QoS rule to edit:

Enter ‘0’ to remove the default 2 Mbps limit, update and save it.

Powershell script to install Nasuni Filer on Windows Hyper-V 2012 R2
Nasuni provides managed storage service that offers interesting functionality in the cloud integrated storage space. The Nasuni Filer Virtualization Guide suggests to import the Nasuni Filer VM from the unzipped files from filer-hyperv-6.1.1-99.zip. Before using this script you need to obtain the Filer.vhd file – see this post for more details.
This script automates and streamlines the process of installing the Nasuni Filer Virtual Machine on Hyper-V 2012 R2. It can be downloaded from the Microsoft Script Center Repository.
In this example,
- I’ve stored the script as \\rd06\scripts$\Install-Nasuni-Filer.ps1
- I’m running the script on a Hyper-V host
- I will storing the VM files under C:\ClusterStorage\Volume1 – this can be any local path on the Hyper-V host
- The path for the needed Filer.vhd file is \\rd06\d$\Nasuni\Filer.vhd
- In this particular environment, guest networking is on VLAN 5. If you’re not using VLANs you can omit this parameter
- I will call this VM “Nasuni-Demo2”
Dot source the script with parameters similar to:
. \\rd06\scripts$\Install-Nasuni-Filer.ps1 -VMPath C:\ClusterStorage\Volume1 -VHDPath \\rd06\d$\Nasuni\Filer.vhd -VLAN 5 -VMName Nasuni-Demo2

The script creates a subfolder with the VM name under the VMPath
It converts the Filer.vhd to VHDX format. VHDX format has many performance and other enhancements over VHD.
It creates the Nasuni Filer VM as Gen 1 VM.
It detects the host’s first external vSwitch and attaches the VM vNIC to it. If you have more than 1 external vSwitch on this Hyper-V host, you can spell out which one to use in the command line by using the -vSwitch parameter
It sets the VM startup memory to 6GB as recommended by the Nasuni Filer Virtualization Guide.
It assigns the VM 4 CPU vCores. This can be adjusted by the optional parameter -ProcessorCount
It sets VM automatic start action to “start”. This ensures the VM is started when the host is rebooted.
It sets the VM memory to static. This VM does not have the Hyper-V Linux Integration Service and cannot use dynamic memory.
It assigns the VM vNIC a static MAC address. This is necessary for live-migration. Otherwise the VM will lose its IP settings when live-migrated.
It assigns the vNIC VLAN ID if the -VLAN parameter is used
It creates and adds the Cache.vhdx and COW.vhdx disks and attaches them to the VM. They’re attached to SCSI controller 0 / LUN 0, and controller 1 / LUN 1. This is to mirror setup suggested by Nasuni. It’s not clear why the Cow.vhdx disk needs to be on a separate SCSI controller or why it needs LUN 1 specifically. By default, the second SCSI disk added will go on controller 0 / LUN 1.
Finally the script starts the VM.

As usual, the script leave a log file behind on the folder where it ran. Log file lists steps taken and will look like:
2014.12.05 06:50:23 AM:

 Directory: C:\ClusterStorage\Volume1

Mode LastWriteTime Length Name
---- ------------- ------ ----
d---- 12/5/2014 6:50 AM Nasuni-Demo2

2014.12.05 06:50:23 AM: VM Path 'C:\ClusterStorage\Volume1\Nasuni-Demo2' has been verified/created
2014.12.05 06:50:23 AM: Converting file '\\rd06\d$\Nasuni\Filer.vhd' to 'C:\ClusterStorage\Volume1\Nasuni-Demo2\Filer.vhdx'..
2014.12.05 06:55:13 AM: done in 50 seconds
2014.12.05 06:55:13 AM: Creating VM 'Nasuni-Demo2' on host 'HV02-A'..
2014.12.05 06:55:16 AM: done in 2 seconds
2014.12.05 06:55:17 AM: Configured VM 'Nasuni-Demo2' with '4' CPU cores
2014.12.05 06:55:17 AM: Configured VM 'Nasuni-Demo2' to automatically start upon host bootup
2014.12.05 06:55:50 AM:
VMName VMNetworkAdapterName Mode VlanList
------ -------------------- ---- --------
Nasuni-Demo2 Network Adapter Access 5

2014.12.05 06:55:50 AM: Set VLAN ID for vNIC 'Network Adapter' to '5' on VM 'Nasuni-Demo2'
2014.12.05 06:55:51 AM:

ComputerName : HV02-A
Path : C:\ClusterStorage\Volume1\Nasuni-Demo2\Cache.VHDX
VhdFormat : VHDX
VhdType : Dynamic
FileSize : 4194304
Size : 68719476736
MinimumSize :
LogicalSectorSize : 512
PhysicalSectorSize : 4096
BlockSize : 33554432
ParentPath :
DiskIdentifier : dcf132e9-6e97-4523-b6cf-7cd2944372b1
FragmentationPercentage : 0
Alignment : 1
Attached : False
DiskNumber :
Key :
IsDeleted : False
Number :

2014.12.05 06:55:52 AM:
VMName ControllerType ControllerNumber ControllerLocation DiskNumber Path
------ -------------- ---------------- ------------------ ---------- ----
Nasuni-Demo2 SCSI 0 0 C:\ClusterStorage\Volume1\Nasuni-Demo2\Cache.VHDX

2014.12.05 06:55:52 AM: Created and added 64 TB dynamic cache disk 'C:\ClusterStorage\Volume1\Nasuni-Demo2\Cache.VHDX' to VM 'Nasuni-Demo2'
2014.12.05 06:55:54 AM:

ComputerName : HV02-A
Path : C:\ClusterStorage\Volume1\Nasuni-Demo2\Cow.VHDX
VhdFormat : VHDX
VhdType : Dynamic
FileSize : 4194304
Size : 64424509440
MinimumSize :
LogicalSectorSize : 512
PhysicalSectorSize : 4096
BlockSize : 33554432
ParentPath :
DiskIdentifier : 48a4a329-3303-4c7e-b4c9-e958fcf67e03
FragmentationPercentage : 0
Alignment : 1
Attached : False
DiskNumber :
Key :
IsDeleted : False
Number :

2014.12.05 06:55:55 AM:
VMName ControllerType ControllerNumber ControllerLocation DiskNumber Path
------ -------------- ---------------- ------------------ ---------- ----
Nasuni-Demo2 SCSI 1 1 C:\ClusterStorage\Volume1\Nasuni-Demo2\Cow.VHDX

2014.12.05 06:55:55 AM: Created and added 60 TB dynamic cow disk 'C:\ClusterStorage\Volume1\Nasuni-Demo2\Cow.VHDX' to VM 'Nasuni-Demo2'
2014.12.05 06:56:07 AM: Started VM 'Nasuni-Demo2'
After VM installation, go to Hyper-V Manager:

Open the VM console, you’ll see display similar to:

In this example, I have DHCP server running on the network. The Nasuni Filer VM obtained an IP address via DHCP as shown.
If no DHCP server is running on the network, assign IP address to the Nasuni Filer VM by using the following commands:
- Hit enter to enter the Service Menu, login as service, password is service


- Type in the following commands:
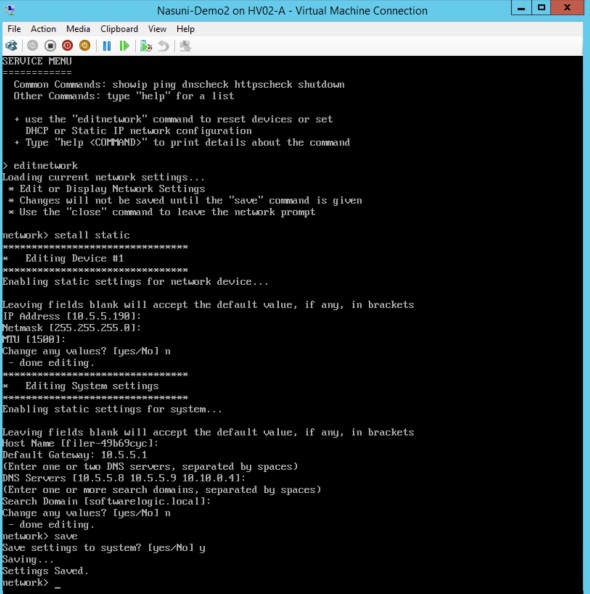
- editnetwork
- setall static
- Enter the desired IP information for the VM.
- Type in “save” to save settings
- Type in “close” to exit the Service Menu

Browse to the IP address of the Nasuni Filer to complete setup. Bypass the certificate security warning. 
Enter/confirm IP settings.
 Click on the Edit button next to the Ethernet 1 device to update its IP info. Enter 9000 for MTU if using jumbo frames.

Review and continue.  Click Continue to save settings.
Enter Serial Number and Authorization code. In the email from Nasui, there will be a link and credentials to obtain these. 
Type in “confirm” to confirm, and check the box to accept the EULA. Confirm/edit the name for this Nasuni Filer. 
If you already have the Nasuni Management Console (VM) deployed, you’ll get this screen:
Check the box to manage this Filer under the central NMC.
Enter/create admin credentials for this Filer. 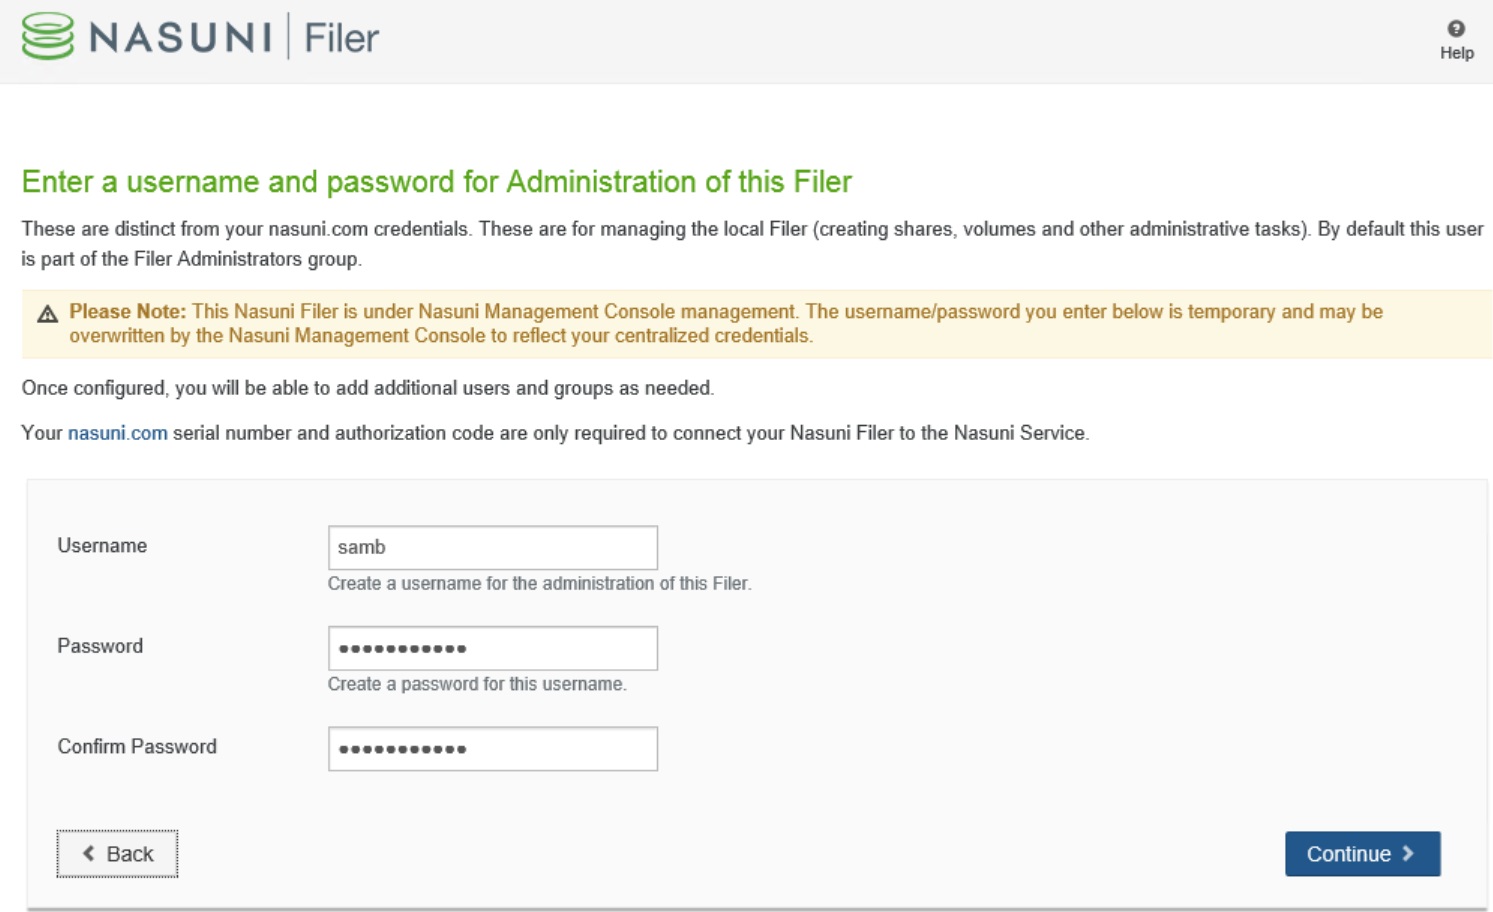
The Nasuni service: Getting Started
Nasuni provides managed storage service that offers interesting functionality in the cloud integrated storage space. To get started with the Nasuni service you can sign up for a 14 day free trial. Once approved, you’ll get an email with links for the bits and credentials to access and use the Nasuni service.

One easy way to start and try the service is to use virtual filer(s). I will install 2 Nasuni filers and 1 Nasuni Management Console VM on Windows Hyper-V 2012 R2 in 2 sites in this demo.
After downloading the filer-hyperv-6.1.1-99.zip file for example, unzip it:
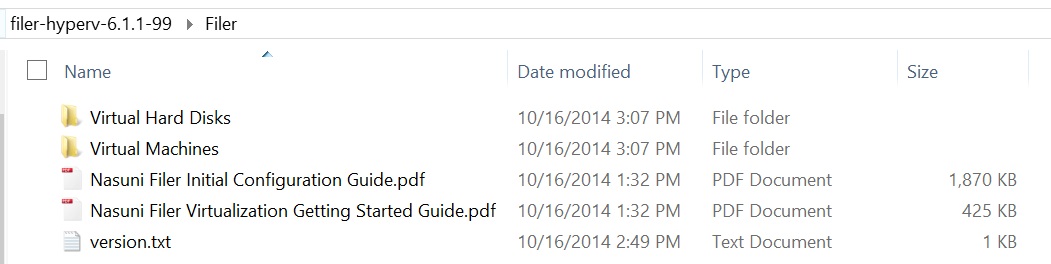
You will need about 17 GB disk space to unzip this file. Under the “Virtual Hard Disks” folder is the Filer.vhd file that will be used by the Install-Nasuni-HyperV.ps1 script that can be downloaded from the Microsoft Script Center Repository.
Nasuni managed storage service overview and how-to
Nasuni provides managed storage service that offers interesting functionality in the cloud integrated storage space.

The Nasuni Filer is a Virtual Machine (on Hyper-V, VMWare or other hypervisor) or a physical appliance that is implemented in each client site. It runs a Linux OS and provides storage to local clients as NFS3, SMB2, or iSCSI. Many Filers can be implemented in one or more client sites.
The Nasuni Management Console (NMC) is implemented as a virtual machine running Linux. It provides a web interface for managing all Filers and the Nasuni service and account throughout the organization.
Volumes are provisioned on the Nasuni filers. They’re thin provisioned. Volume data is replicated automatically via the Nasuni service to the public cloud. Currently, Nasuni uses Azure in the back end. Customer has no direct cloud visibility. Cloud access and storage is bundled and abstracted by the Nasuni service.
The Nasuni UniFS runs on the Nasuni Filers. It provides NFS3 and SMB2 shares to local clients. Shares can be replicated and cached to other Nasuni filers in other client sites via the Nasuni service. The Nasuni service places the primary data set on the public cloud (256-bit AES encrypted) and replicates the actively used files to each site as needed (some configuration required as I will illustrate).
Similar to other cloud integrated storage solutions, Nasuni service is suited for unstructured data/workloads such as file shares. It’s not suited for tier 1 workloads such as Hyper-V, SQL, Exchange, …
The following posts will go over setting up and using the Nasuni service:
