Running Powershell script functions
Many of the scripts I write contain reusable code as functions. For example, the Merge-VMDisks.PS1 script contains Merge-VMDisks function. To use these functions, you must load them first into memory in the current Powershell session. Running the PS1 file will do just that; load the function in memory. It will NOT run the function.
Powershell stores a list of the currently available functions in the function: drive. To see available drives type:
Get-PSDrive
You will get a result similar to:
 To explore the contents of a PS drive, we can use the Get-Item cmdlet like:
Get-Item -Path function:
You will get a result similar to:
 In this example, to use the Merge-VMDisks function we need to load it into memory first in the current PS session by running the PS1 file:
E:\Install\Scripts\Merge-VMDisks.ps1
Get-Item -Path function:
Now running the Get-Item cmdlet shows 3 new functions loaded – that we got form the Merge-VMDisks.ps1 script:

Now that we have the function in memory, we can use it by invoking the function as we do any PS cmdlet. For example:
Merge-VMDisks -VMName ‘MyVM’
File share migration – Phase 4 – Dealing with files that failed to copy
3/17/2015 update:
I updated the Powershell script to report on files and folders copied and the duration it took, and export that information to CSV files.
Running the same command:
Get-FailedFiles (Get-ChildItem -Path .\logs | where { $_.Name.StartsWith('Robo') }).FullName
The script now produces output to the console like:
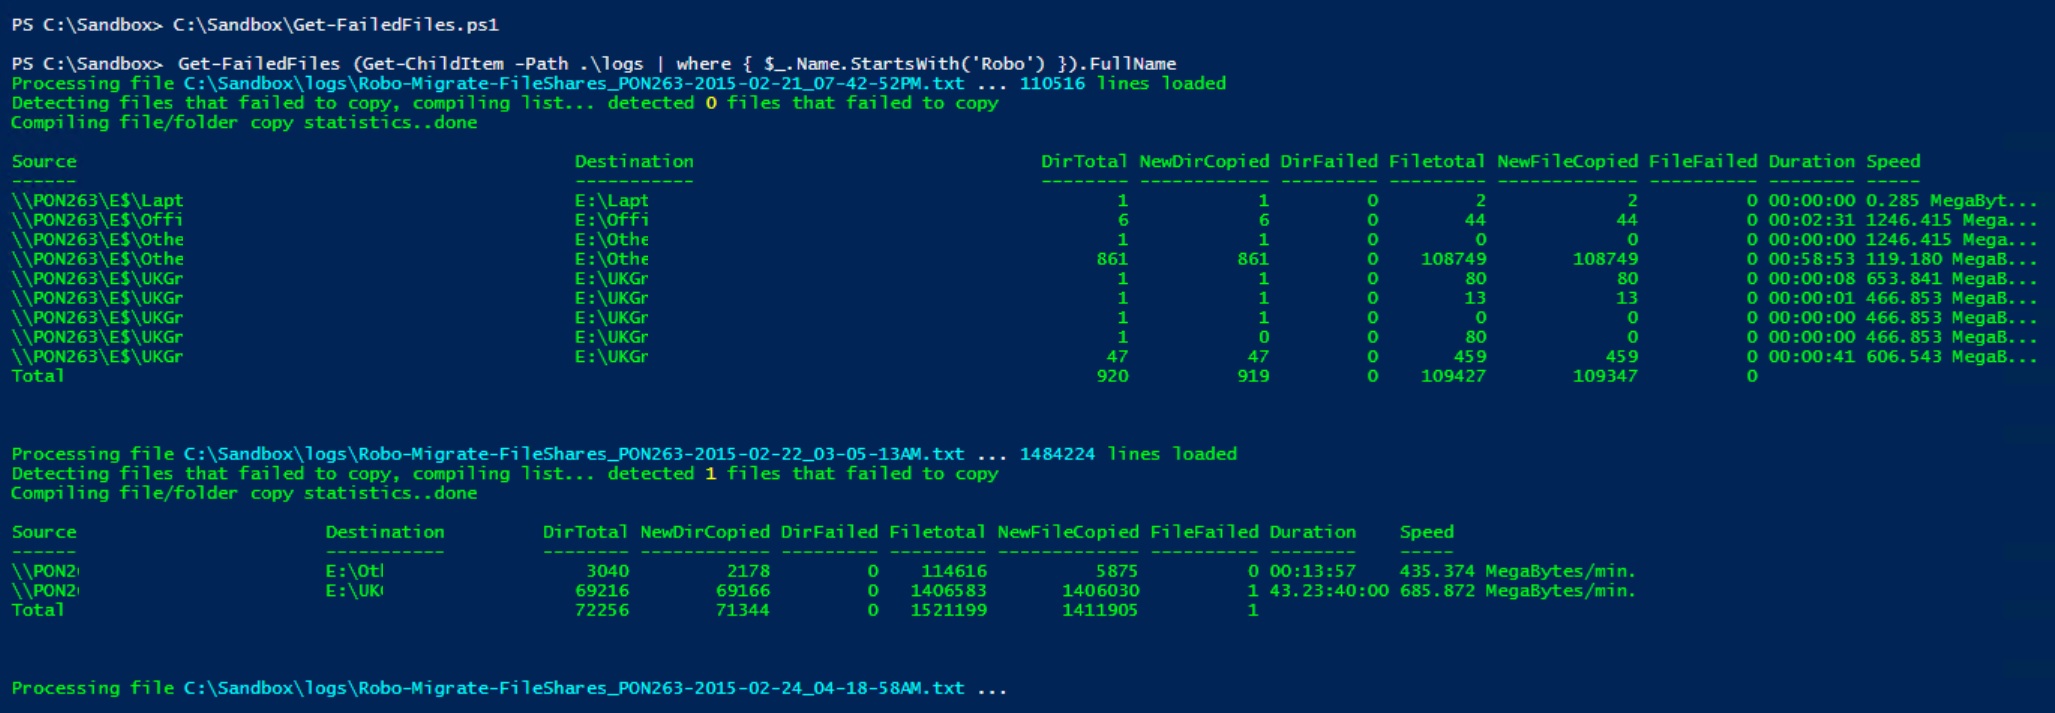
and saves two CSV files to the current folder. One contains the file/folder copy summary statistics displayed on the console, and the other contains the list of files that failed to copy and the error code
Following Phase 3 of file share migration, phase 4 will deal with the files that failed to copy. Most commonly this is because the files were open at the time Robocopy attempted to copy them and it could not get the necessary file lock. Step 1 of dealing with the files that failed to copy is to identify them. This Powershell script goes through one or more Robocopy log files and parses out the files that failed to copy. The script can be downloaded from the Microsoft script center repository.
Get-FailedFiles -RoboLog .\logs\Robo-Migrate-FileShares_NYFILSRV01P-2015-03-11_05-27-26AM.txt
The script returns a list of files that failed to copy and the corresponding error codes:
 This also can be run against a group of files as in:
$FailedFiles = Get-FailedFiles (Get-ChildItem -Path .\logs | where { $_.Name.StartsWith(‘Robo’) }).FullName
This command will parse all the files under .\logs subfolder that start with ‘Robo’ and return the files that failed to copy and their error codes. This can be presented:
$FailedFiles | FT -Auto # in tabular format
 $FailedFiles | Out-Gridview # in Powershell ISE Gridview

$FailedFiles | Export-Csv .\FailedFiles.CSV -NoType # or exported to CSV

File share migration – Phase 3 – importing file share information
Following Phase 2 of file share migration, phase 3 will import file share information. That’s share names, associated share paths, and share level permissions. Fortunately, this information is stored under the registry key
HKLM\SYSTEM\CurrentControlSet\Services\LanmanServer\Shares
During phase 1 of the file share migration, the Get-FileShares function has already copied these registry entries to a .reg file for us and saved it to the source server. Line 4 of the log file identified exact location:
2015.03.11 02:55:09 PM: Information is saved in file \\NYFILSRV01P-SK3\C$\WINDOWS\Shares.reg
To import all these settings simply browse to and double-click on this .reg file from the new Windows 2012 R2 server to import it into the registry.

Click Yes to proceed.
 Finally, restart the Server service for the new shares to take effect:

or, of course we can use the Powershell cmdlets Restart-Service and Get-Service

File share migration – Phase 2 – Robocopy
Following Phase 1 of file share discovery, phase 2 will do the initial seeding and copying of all data from the older Windows 2003 file server to the newer Windows 2012 R2 file server. The script can be downloaded from the Microsoft script center repository.
The same script can be used to run a refresh of the data. It will copy newer and changed files every time it runs. If interrupted, the script can simply be run again. Again only newer or changed files will be copied.
Requirements:
- The same drives must exist on the new 2012 R2 server as the old 2003 server. So, if we have drive letters F, H, M on the older server we must have the same drive letters on the new server.
- The drives on the new servers must have enough disk space to accommodate all copied data. If the drives on the new file server are formatted using a larger allocation unit size such as 64 KB, actual disk space used on the new server may exceed disk space used on the old server particularly if copying many files under 64 KB each.
Here’s an example output when running this script:
 Notes:
- Robocopy copies NTFS permissions on files and folders assigned to domain users and groups. It will not copy permissions to files and folders assigned to local users or groups.
- Robocopy is unaware of inherited NTFS permissions, and will not copy inherited permissions. This is why this script starts from the root of each drive letter to ensure that all NTFS permissions are captured.
- This script is intended to run in the context of a domain user account with local administrative permissions on both the source and target servers.
- Robocopy will copy files with paths longer than 256 characters
- Depending on how much data is being copied, network speed, storage subsystem speed, and whether /IPG option is used with Robocopy to throttle down the copy process, this can take several hours, days, or weeks.
Robocopy options used:
- /XJ :: eXclude Junction points. (normally included by default).
- /R:0 :: number of Retries on failed copies. This is set to not retry failed files. Failed files will be addressed in next phases of the file migration.
- /W:0 :: Wait time between retries: default is 30 seconds. Choosing no waiting here. Again will be addressed in next phases.
- /IT :: Include Tweaked files (A Tweaked file is defined to be one that exists in both the source and destination, with identical size and time stamp, but different attribute settings).
- /MIR :: MIRror a directory tree (equivalent to /E plus /PURGE).
- /COPYALL :: COPY ALL file info (equivalent to /COPY:DATSOU).
- /NP :: No Progress – don’t display percentage copied.
- /TEE :: output to console window, as well as the log file.
- /ZB :: use restartable mode; if access denied use Backup mode.
- /LOG+:file :: output status to LOG file (append to existing log).
Since this will be run against production servers, you may want to consider the /IPG option:
/IPG:n :: Inter-Packet Gap (ms), to free bandwidth on slow lines.
For example, using /IPG:100 will slow down copying by waiting 100 ms between each packet to reduce the load on the source server. This will also make the migration process and file copy longer.
File share migration – Phase 1 – Discovery
Many organizations are struggling to meet the end of support deadline for Windows 2003 servers coming up on July 14, 2015. It’s staggering the number of Windows 2003 file servers still in production out there. This post is the first in a series that deals with file shares migration from Windows 2003 servers to 2012 R2.
As usual, I’m using Powershell to perform this task. This script contains Get-FileShares function and can be downloaded from the Microsoft Script Center Repository. (2 May 2020: Microsoft is “retiring” the Technet Gallery effective June 2020 – see https://docs.microsoft.com/en-us/teamblog/technet-gallery-retirement. To continue to provide updates to this script, its functionality has been ported out to the Get-FileShareInfo function of the AZSBTools PowerShell module at the PowerShell Gallery https://www.powershellgallery.com/packages/AZSBTools. To use this new enhanced function: Install-Module -Name AZSBTools – To see built in help: help Get-FileShareInfo -Show)
This function provides file share information from one or more Windows file servers. This is intended to run from a domain joined Windows 8.1 workstation against one or more file servers in the same domain. However, the source file servers can be Windows 2003 and up as long as Powershell 2.0 or up is installed, and Powershell remoting is configured. For more information on Powershell for Windows 2003 see this post. The function returns information including server name, share name, description, count of currently connected users, and amount of free space on the drive where the share is located. The function also obtains and saves the registry entries for file shares on the source server(s), and provides link(s) to file(s) location. Function output is displayed to screen and saved to log file.
Here’s an example output of running this script against one Windows 2003 file server:
After running the script to load its functions, I used the command:
$Shares = Get-FileShares -ComputerName NYFILSRV01P-SK3 -Passthru

The console output is also saved to a log file under .\logs subfolder similar to this one:

The output can also be viewed in PS ISE:
$Shares | Out-Gridview # shows information in tabular format in PS ISE

This can also be exported to CSV for viewing in Excel:
$Shares | Export-Csv .\NYFILSRV01P-SK3.csv -NoType

Note that CSV is not suited to handle complex data types. XML is more suitable for that. However, if you wish to list share permissions in CSV, we can use a small script like:
‘”ServerName”,”ShareName”,”Path”,”ShareUser”,”SharePerms”,”ShareAccess”‘ |
Out-File .\NYFILSRV01P-SK3b.csv -Encoding ascii
$Shares | % {
$ServerName = $_.ServerName
$ShareName = $_.ShareName
$Path = $_.Path
$SharePerms = $_.SharePerms
$ShareAccess = $_.ShareAccess
$i = 0
$_.ShareUser | % { “””$ServerName””,””$ShareName””,””$Path””,””$_””,””$(if ($SharePerms.Count -ge ($i+1)) {$SharePerms[$i]})””,””$(if ($ShareAccess.Count -ge ($i+1)) {$ShareAccess[$i]})””” | Out-File .\NYFILSRV01P-SK3b.csv -Append -Encoding ascii $i++ }
}
 and the output will look like:

